Back at the beginning…

The recent beginning:

The first ground wire

The first ground

It has been a long journey, and this is just the most recent step.  We are still working on the electrical, but we are getting the engine ready as well. We have finished the engine inspection, addition of all external hoses, clamps, gaskets, etc. We have purchased new or rebuilt accessories (Carb, Mags, Alternator, fuel pump, etc) and we just received the propeller. I originally went with a wood prop, but since that would add 15 hours to the Phase I fly-off, I decided to go with a standard Sensenich propeller.

We will soon be at 7 years of building, and here is where we started:

Empennage Kit for RV9A

Empennage Kit for RV9A

Happy Thanksgiving and keep pounding those rivets!

Let me get this straight…

*sigh*  I goofed.


No easy way to say this, but I goofed. And I thought BIG TIME

We drilled the elevator horns on the tail by aligning the counter weights to the horizontal stabilizer. Straight tail, straight elevators, right?

Nope. Wrong

RV-9 Elevator

RV-9 Elevator

Somehow, I managed to get the two halves out of alignment. Only a degree but my hanger partner (who built a 7) told me that will never fly right.  Now what the heck am I going to do? I drilled the hole!  Move the hole? Hmmmm…. not enough room.  Replace the horn?  OUCH! I’ll have to re-skin the tail!

Turns out there is a simple solution.  Take the entire tail over to Walter the Welder (Yes, his name really is Walter) and have the hole filled. Grind it smooth, repaint and I’ll have a second chance.


RV-9 Elevator horn hole filled.

Elevator horn hole filled.

Lost a little powder coating but Walter did a GREAT job of filling.  I filed it smooth, then took a scotchbright wheel to it, and cleaned with MEK.

RV-9 elevator horn repair finished

finished repair

My guess is that I’m not going to be able to do that more than once, so I better be CAREFUL this time.


Lightweight riveter!

No, I’m not talking about me.  I’m good at riveting, but rather a pretty cool tool I discovered at Harbor Freight.

On the Van’s Airforce and other Van’s aircraft lists, there is considerable discussion about which rivet gun should I buy? 2X? 3X? These things are pretty expensive, and you want to be sure you get the right one first!

Well, not so! Enter the 1X gun from autoparts stores, hardware chains or (best of all) Harbor Freight!

HB and others sell a small, lightweight Air Hammer for under $10 (yes, I said ten dollars) that is GREAT for AN426AD3-x rivets, especially the TONS of rivets that you do on the wings.

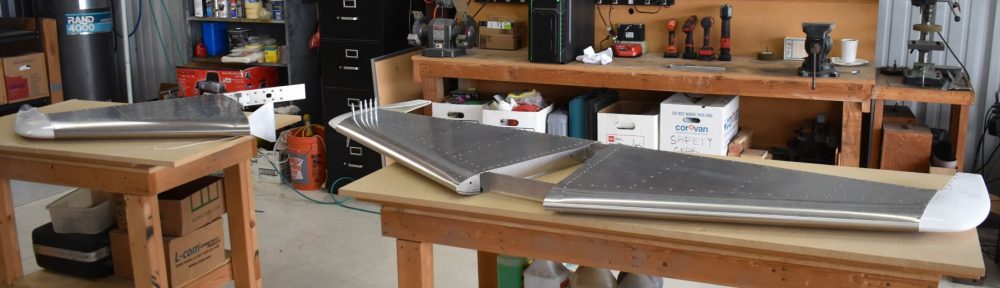
You have to get the right one, and with just a little careful selection, you can have GREAT looking skin!  I’ve just finished my wings, and they look GREAT!

What is the difference between an Air Hammer and a Rivet gun?  About $150.00

What to look for?

1. Small and light.  Better control and you won’t tire after 500 rivets or so.

2. A trigger you can feather, like this one.

Triggter on 1X air hammer.

Trigger you can feather

This was not so good a choice:

not a good coice for an air hammer

Trigger with poor feather control

3. Built-in regulator.  This worked VERY nice:

Pressure regulator on Air Hammer

Pressure regulator on Air Hammer

4. Throw out any accessories you get with the gun, and buy a nice rivet set. I prefer the flat set with a rubber ring around the edge to prevent the gun from running away. Also, go ahead and get a nice swivel whip tail.

5. You may still need a nice 2x or 3x gun, but for skins, this is the BEST.

You will see you get a really nice rivet gun for the small skin rivets with good control, easy to adjust and not driving them clear through to the other side of the wing with too strong of a gun. And the cost? under $10.

Rivet gun/Air hammer for skins

Rivet gun/Air hammer for skins

My rivet gun

My rivet gun

Dkb

Getting rid of the blues… (A little at a time)

When I started the empennage, I saw some folks removing strips of the blue protective film by using a soldering iron and decided that the risk of scratching the skin was too great, so I peeled off all the protective film.  What a mistake!  Even with protective inserts in the emp jigs, the tail got pretty scuffed.  OK, so now I’m on the wings, but the  soldering iron route takes too darn long to mark and stripe, and I’m STILL afraid I’ll scratch the skin.  So here is my hint of the day…

To remove strips of blue protective coating from the skins:

1. Be sure the soldering iron has only a smooth rounded tip on it.  I took mine to the buffing wheel and made it real smooth.

Clean and deburred soldering iron

2. Buy an aluminum yard stick. With a number 40 drill, drill three or four hold in the middle of the yard stick.  One at the very end, one near the other end, and one about 1/3 of the way up the yard stick.

Yard Stick

Aluminum Yardstick

Be sure to de-burr the holes.

3. Now you can anchor the yard stick in the skin, and use the soldering iron to melt away one or BOTH sides to leave a nice clean center line and remove the blue stuff.

Cleco the yard stick down

Wow! nice clean straight lines. Fast and easy, with less of a possibility of burning yourself, easy to do with one person with better control so you do not scratch the metal.

Cool.

-Dkb

Blue film removed

Blue film removed

Murphy’s Law, as it applies to aircraft…

So, I took the EAA RV builder’s class. I went over to Dan’s house and helped him a little with his RV-7. I bought and built the practice kit. I attended the EAA RV builder’s class a second time with Tom. Built ANOTHER test project.  Bought all the right tools, built a very nice work table. Got absolutely EVERYTHING ready. Finally, I got the tail skin together, cleaned and drilled and deburred and READY to go!  And when I went to drive my VERY FIRST rivet into my project: BANG!   I missed.

Big dent in tail skin.

BIG dent in tail skin

So, for those of you who have never heard of Murphy’s Laws, here is the First Law:

“If anything can go wrong, it will go wrong”

  • First Corollary: “In a manner to make you look the most foolish”
  • Second Corollary: “In a manner that will produce the most damage”
  • Third corollary: “Only on the most expensive parts”

*sigh*