I’m gonna THROTTLE you!!!

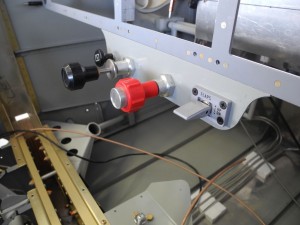
So, that is what we did. This week-end we added the throttle/mixture/carb heat/flap switch panel to 18TD.  The control cables went in reay easy, but not so much with the flap switch. A normal flap switch has 6 connectors so it is pretty wide. Looks like the flap switch plate I bought was not designed with that in mind. We got it to fit, but it was a bunch of work.

throttle cluster

Engine Control Panel

We are making pretty good headway with the three part panel, but I’m kinda nervous about leg room. I’m a tall guy, and it looks like the panel is getting into the pilot area.  We will not know until I get the fuse off the rotisserie and on to a safe stand where I can sit in the thing.

I got the firewall forward plans today, so we are starting to verify we are ready to add a motor mount. Battery is in, Master/start relay is in, and we have most holes punched. I’m gonna do some control cables after I have the motor mount in place to verify position.

Next week is a special anniversary for us, so stay tuned.


Panel Sub Structure

We are getting close to the time we will need panel $tuff.  Yikes!

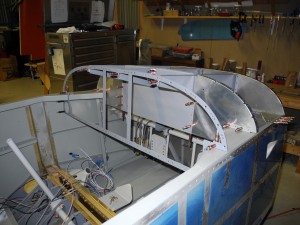
Here is the panel superstructure.

Panel Support Framework

Panel Support Framework

We got the Affordable Panels three part panel, so you can remove sections for maintenance. Really a good idea.  AP sells two designed, the 1./3, 1/3, 1/3 design where each of the three sections are centered (the kind I bought) and one where the left (pilot side) is larger. I’m not sure I bought the rigth version, because the center support rib lands smack dab in the middle of the radio stack, and will severely limit the space available for radios. I’ll have to work on that.  This would be fine for a VFR only aircraft, or one that has lots of remotely mounted radio stuff.

Here is a Hint I got from Keith, a fellow builder: Put platenuts on the bottoms of the panel support ribs to add adel clamps later if you need them for wiring support.

In my opinion, you can’t have too much support for wire.  I also plan on lots of holes with snap bushings.

CC

Jaws of Life, Death and other things…

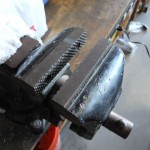
Yikes! I have a butt-kicking vise in my shop that will grab a hunk of metal, and hold on like a Gila monster!

Jaws of vise

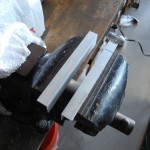
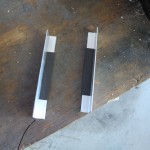
But sometimes, you want to hold something a bit easier, and not make marks in the item clamped in the vise.  A simple solution is to cut a 3/4 by 3/4 angle into a 4 to 6″ length. Place that in the vise, and voila!  An easy holder for small parts.

Aluminum insert for vise clamping.

Aluminum inserts

But wait. These baby’s are always falling out and on to the floor every time I try to put something into them.   So, HERE IS THE TRICK:

Buy some self-stick magnets from your local stationary store, and cut to size, and glue them on to the angle.  They stay in place, and make it easy to move the insert around.

Vise Inserts with magnets

Aluminum vise jaw inserts with magnets.

Remember to put the magnets on top of the vise so you do not try to squeeze them.

CC